Thank you!
We need to fund this campaign ASAP! Get your friends involved

Share this fundraiser on Instagram
Together, we can achieve great things!
Терміновий збір коштів на закупівю тепловізорів для українських захисників

The military thermal imager is one of the most important optical devices for hunting or modern combat. Fog or dust, day or night, the thermal imaging device provides flexibility, versatility, and tactical superiority at any time of the year and in any weather.
Choosing a PNB or thermal imager is often difficult, especially for a novice who makes his first choice for hunting or military operations. More and more brands are entering the market, from expensive military models to cheaper, domestic ones. Military-grade thermal imaging equipment is designed for harsh combat conditions and costs significant money compared to more affordable models. Before choosing a military thermal imager, read this guide to help you make the right choice. You will also find the answer to what kind of thermal imager the Ukrainian army needs now.
At the end of this article, we will also simplify the task by identifying the best requirements for a modern thermal imager for the military.
In a broad sense, night vision devices and thermal imagers can be divided into the military (law enforcement agencies, police, or army) and civilian (hunting, tourism, utilities). Unfortunately, the war has deprived many citizens of Ukraine of pleasant leisure and to choose between nice and necessary. Almost every Ukrainian is ready to take arms and defend his life, the life of his family, his native land, and the independence of his country. Therefore, let’s discuss the equipment that will help us fight for our future.
A military thermal imager is a complex digital technology, so the presence of comprehensive instruction is the first necessity. Whatever your attitude to the manuals, it is necessary to read the instructions for the thermal imager. This is half the success if you find something to read with the device. We can proceed to an overview of the main parameters.
A military thermal imager based on one of two technologies:
If there is something to choose from and the budget allows, it is better to take a model on a more modern matrix, and the picture quality will be noticeably better.
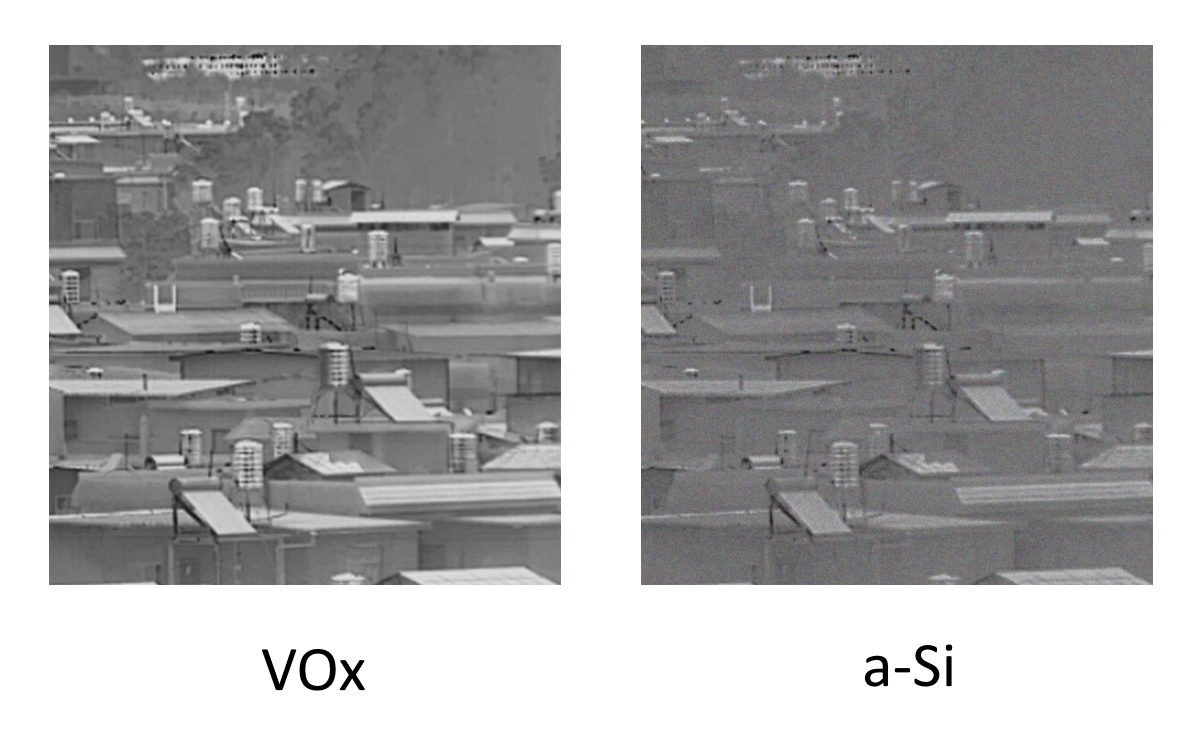
This feature is an advantage of the top models of military thermal imagers. Cooling the matrix allows you to get a better picture. Thermal imagers with such a matrix better distinguish the target, even if its temperature is minimally different from the ambient temperature. Prices for such devices can be very high, but models without cooling also do their job quite well.
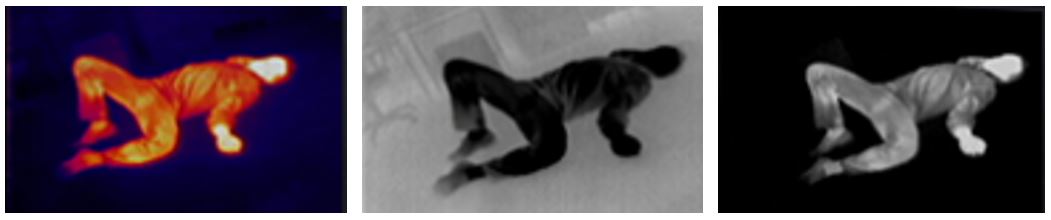
The higher the value, the clearer the picture and profile of the target. The high-resolution matrix will provide great detail and distance to be monitored. We recommend that you choose at least 400×300 pixels.
| 128×96 | We do not recommend |
|---|---|
| 160×120 | We do not recommend |
| 384×288 | Acceptable value |
| 400×300 | Acceptable value |
| 640×480 | Recommended value |
| 1024×768 | Recommended value |
The distance at which the object can be recognized and identified defines the quality and advancedness of the thermal imager. The better the indicator, the easier to recognize the object and determine it by external signs at a certain distance (distinguish a person from an animal, small movements, type of vehicle, etc.). This figure is related to the previous paragraph, and some manufacturers indicate a specific distance in meters on the packaging for convenience. We recommend a minimum of 1500 m.

As in photography, thermal imagers differ in focal length, brightness, and diameter of the front lens. The easiest way to pay attention to the size of the lens, the larger its diameter, the better the picture will be. From a focal length, it is simpler: the smaller it is, the wider the angle of view and the smaller the scale of the picture (30 mm or less).
The larger the value, the larger the area will be visible. To track a large area, you need to choose the minimum value. If a small and distant object, then the maximum. A thermal imager with an adjustable angle can be a very successful and versatile purchase.
| Lens focal length | Classification | Transfer of perspective | FOV: viewing angle, field of view |
| 6-25 мм | Wide-angle | Large field of view, reduced image scale | More than 15° (> 260 м/1000 м) |
| 35-50 мм | Normal | Standard field of view, the usual scale of the image | 7-15° (122-260 м/1000 м) |
| 70-200 мм | Telephoto Lenses | Narrow field of view; enlarged image | Less than 7° (< 122 м/1000 м) |
It is necessary to specify which zoom and in what values is used. If the zoom is optical, the picture remains its quality. If digital, then the image on the screen will deteriorate with each magnification threshold. Zoom is a very useful option that will allow you to control the selected area from a safe distance. Prefer optical zoom with at least twice the magnification.
When evaluating the display, it is important to rely on your impressions of working with it. If you want to start from specific indicators, pay attention to the resolution, screen type, and refresh rate. Manufacturers do not often specify the screen resolution in thermal imagers, but 1280×960 pixels are good. OLED will be the best option for the screen type. This kind of screen will give a crisp picture and contrast, compensating for the matrix’s shortcomings and digital image processing. As for the refresh rate, the higher it is, the smoother the picture will look. Choose from 30 – 50 Hz. The lower value is unlikely to be comfortable.
The number of settings and features in the thermal imager is usually much smaller than in the camcorder, but some are very useful. We advise you to pay attention to the number of image filters. They are needed to adjust the device to a specific environment and task, be it forest, field, city, day/night, target type, etc. A variety of color filters allows you to adjust the comfortable image for maximum differentiation and tracking of goals.
Like a regular camcorder or camera, the thermal imager consumes energy. Still, since the device’s compactness is a tactical advantage, the power supply can not boast great battery life in some models. We advise you not to pay much attention to the number of mAh but to focus on the ability to quickly replace the battery (ideally with normal AA, AAA) or connect an additional battery/power bank. A good indicator for the battery is continuous operation all night or 7-9 hours.
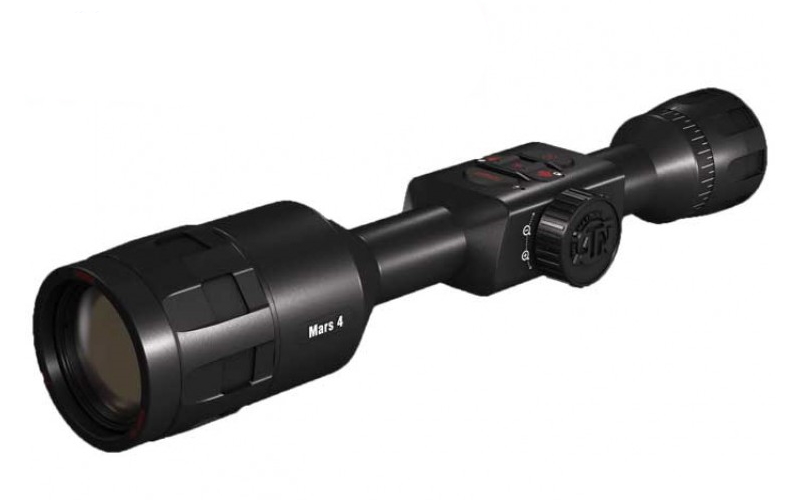
Scopes is an impact-resistant monocular with a reticle for mounting on a weapon with a standard Picatinny rail. Quite a specialized device that attaches to the firearm. We advise you to pay attention to the mounting rings that come with the kit, they are often not of the best quality, and you have to buy something more reliable.
Night nozzles for optical day scopes are mounted on the lens with a special adapter. This option requires a lengthy setup, аccurizing, and time for installation and dismantling.
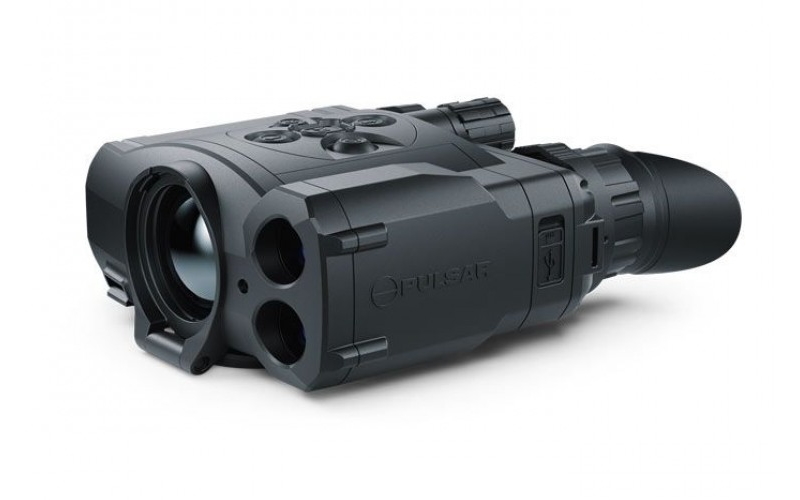
Monoculars — a device for observation with one eye, looks like a spotting scope. Due to the price and compactness, they are the most popular devices for hunters after sights. The most common and universal type of thermal imager.

Binoculars – a device with paired glasses for two eyes, as in ordinary daytime binoculars. Used for long-distance surveillance.
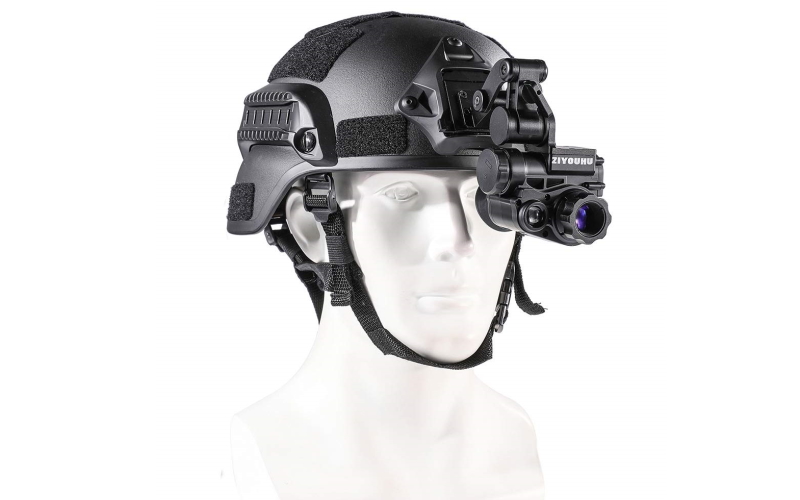
Glasses – a monocular or binocular that has a lens with a magnification of 1x and a head mask. Mainly used for indoor observation at close distances.
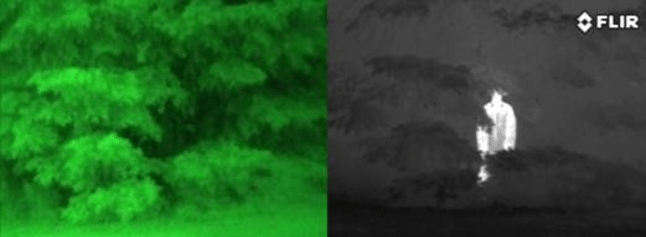
Everything is simple here; both the NVD and the thermal imager are night optics. In the first case, it is analog equipment, and the thermal imager is a digital device similar to the camcorder.
NVD enhances vision and allows you to work with good efficiency at night as during the day, drive a car without lighting, navigate on rough terrain, move at high speed, read a text and distinguish small details.
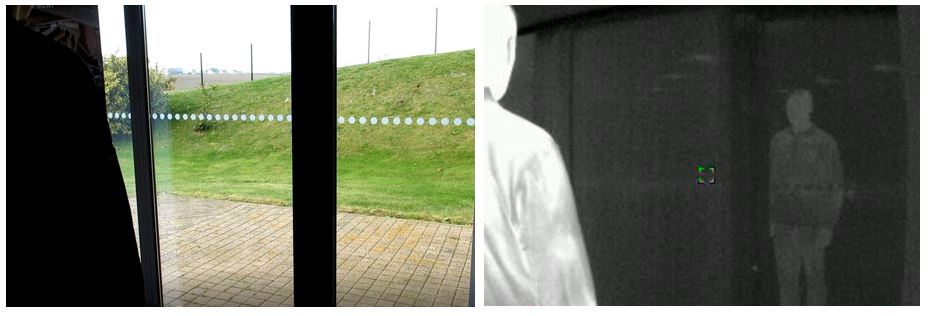
The thermal imager allows you to see what is inaccessible to the naked eye, a recently working car, a weak thermal trace of cigarette butts, the remains of a fire, and a masked cluster of living targets.
There are four generations of NVD from which it is necessary to choose 3 or 4. In the first two generations, for the operation of the device special infrared illuminator which can unmask the observer is needed. 3 and 4 gen works without it.
The picture in NVD is more pleasant and more familiar to the eye. The equipment has a longer operating time, and the price is lower than the thermal imager. Good for orienteering and driving at night.
Does not track heat targets and works effectively only at night.
Target recognition at any time of the day, the ability to fine-tune, light filters, write to a flash drive and broadcast on the monitor.
Does not see through a glass, requires experience and skill, does not distinguish between targets that do not emit heat, and poorly recognizes small obstacles such as wires, branches, bumpy ground, or roads.
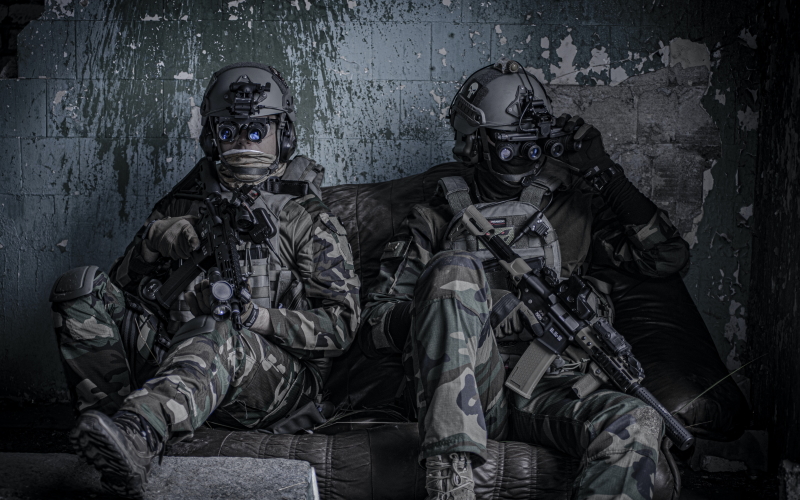
Сonsidering the pros and cons of the devices, the professional military often uses both options. NVD in the form of mini-binoculars or glasses are attached to the helmet and used for orienteering in poor visibility or at night. The thermal imager is used as a sight attachment. Thus, both devices close all the “blind spots” and prepare the soldier for most situations.
If you have decided on the type of device and are not ready to understand the technical details, we have prepared for you a set of optimal characteristics that should have a good thermal imager:
Even if you are well prepared, have studied the technical characteristics, and know exactly which thermal imager you would like to buy for yourself, this does not mean that this device will be able to help our soldiers at the forefront. The fact is that almost all military thermal imagers have a sufficient set of characteristics to meet any needs. The problem is that these needs can be very different.
Snipers need sighting nozzles, drivers will be more comfortable working with classic NVD, gunners will not be able to work without high-quality stereoscopic binoculars or a wide-angle monocular, and assault units prefer goggles that attach to the helmet and release both hands. Much also depends on the battlefield. For example, during battles in the open field, or meadow, the thermal imager should cover a large area and “get” as far as possible. In urban battles, the thermal imager must differentiate targets against buildings’ backgrounds and many objects emitting heat.
Thus, only the soldier or the commander of the Ukrainian Armed Forces knows under what conditions the night vision device or thermal imager will give them an advantage.
Prices for military night optics are higher than for industrial ones. Price is due to the devices’ operating conditions and quality requirements. Thermal imagers for the Armed Forces and any other army must be constructed of the highest quality materials and incorporate advanced technologies because life depends on this tech. The average military thermal imager price that would meet military requirements starts from USD 3,000.
Choosing a thermal imager is very different from choosing a household appliance or smartphone because a professional tool must meet specific requirements. The mistake of choosing a military thermal imager can completely devalue the help that the Ukrainian army so desperately needs. For example, in 2014-2015, more than half of the NVD and thermal imagers were purchased by volunteer organizations. Unfortunately, many pieces of equipment turned out to be industrial devices with a range of 10-20 meters. Such thermal imagers are used in production.
We have given you not exhaustive but sufficient information on choosing a military thermal imager, which thermal imagers are needed for the Ukrainian Armed Forces, how much thermal insulation costs, and what they are. Any help for the army is a contribution to the common victory. Stand for Ukraine!